Page 1
Page 2
At the end of this session, you will be able to...
- create a wiki on wikispaces.com
- edit a wiki
- invite members to your wiki
- create a classroom project in your wiki
- add an event to your wiki
- manage various events on your wiki calendar
- view student engagement with the wiki
Page 3
A wiki is a a website that allows anyone to add, delete, or revise content by using a web browser.
The most famous wiki is Wikipedia, an online encyclopedia created by users from around the globe.
Howard G. Cunningham, developed the first wiki which was launched in 1995 called WikiWikiWeb.
Wiki wiki means "quick" in Hawaiian.
You can create or edit the actual site contents without any special technical knowledge or tools. All you need is a computer with an Internet connection. A wiki is continuously “under revision.” Anyone can edit someone else’s work.
However, as the wiki owner, you have the ability to rewind history and take the wiki back to a prior state, as well. You can also set the level of editing control to be given to a person.
Page 4

Page 5
Although there are many free wiki sites available, for the purpose of this demonstration we have chosen to create a wiki on wikispaces.com
1. Go to www.wikispaces.com
2. You have two options: you can either join as a teacher or a student
3. We will first join wikispaces as a teacher
4. Click on ‘I’m a Teacher’
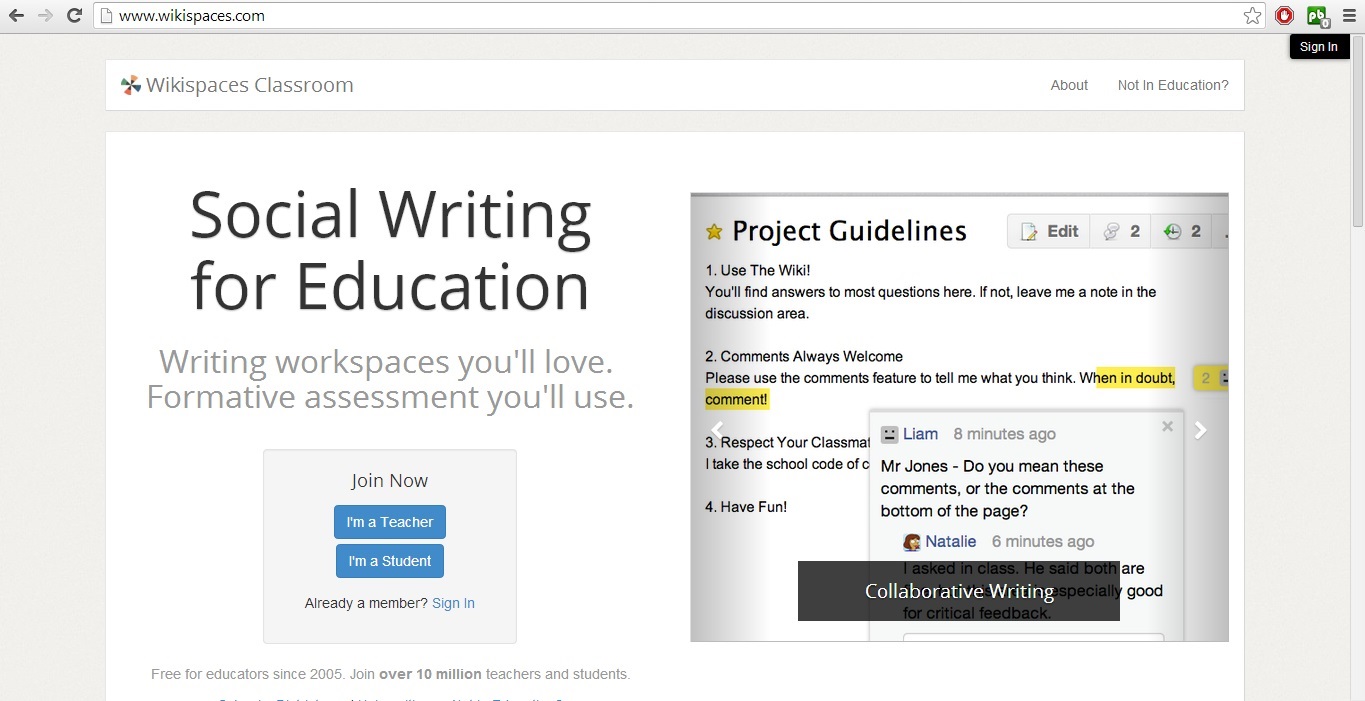
5. A pop up box will open. Choose a username and password and enter your email address.
6. Then click ‘Join’.
7. If the username you entered has already been taken by someone else you will be prompted to select another username.

8. Once you join Wikispaces your ‘My Account’ page will open.
9. Fill in your details on the ‘My Account’ page and then click ‘Create’.

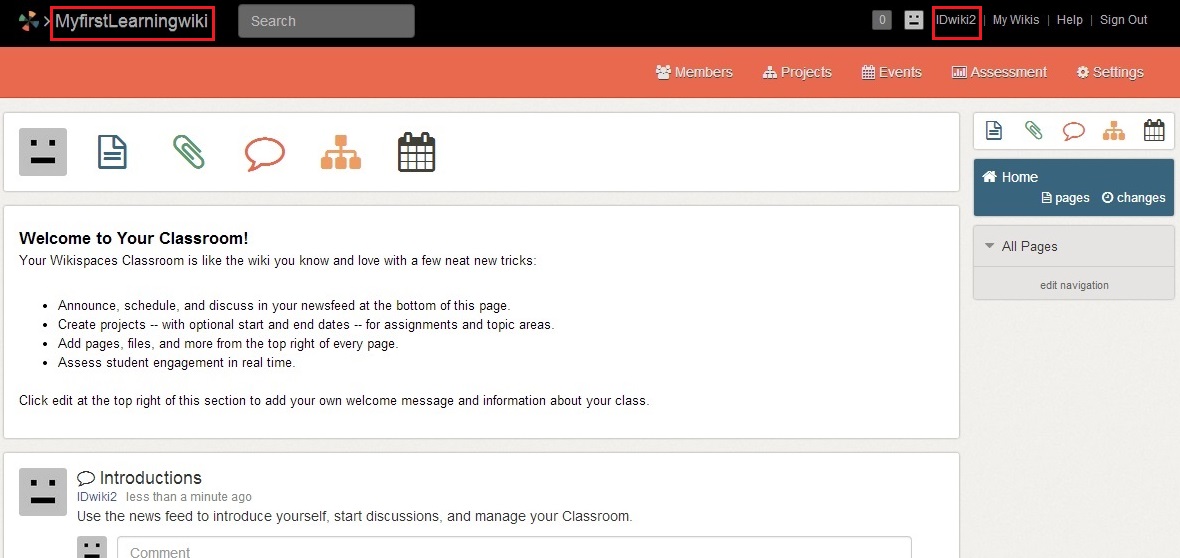
10. Once the wiki is created you will arrive at the Home page of your wiki
11. Your wiki’s name can be seen at the top left hand side of the screen and your username can be seen on the top right hand side
Page 6
You need to first ‘verify your account’ to start using your wiki.
1. Go to your email account (the one which you have provided to join wikispaces)
You will see an email from wikispaces in your inbox.
2. Open the email and click on the link provided to verify your account.
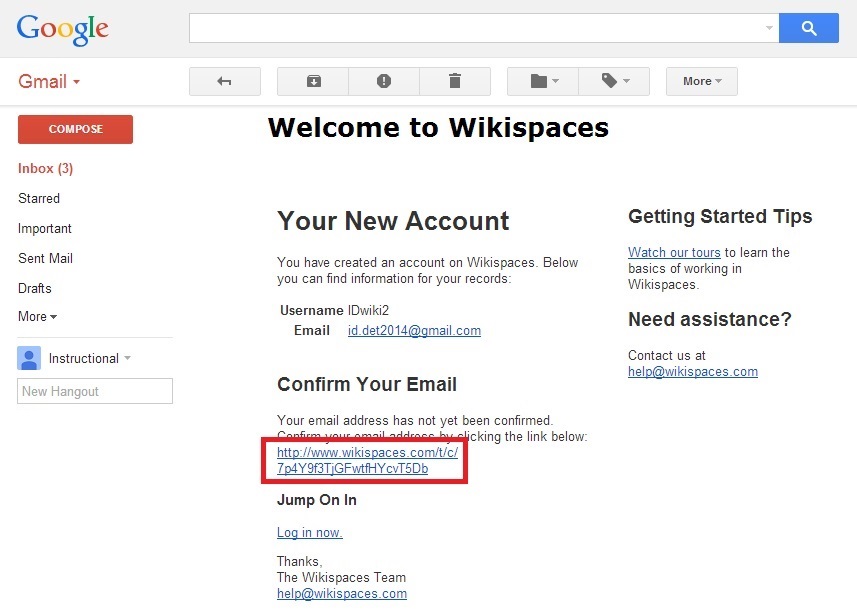
When you click on the verify link you will be redirected to your wiki.
You may arrive at the ‘Dashboard’ view of your wiki.
3. Click on the name of your wiki to go to your Home page.

Page 7
1. Go to wikispaces.com
2. Join as a teacher
3. Create your own wiki
4. Explore all the options on the home page of your wiki
Page 8
1. Go to the settings tab on your home page

2. Then click on ‘General’ under Settings
3. Under Application type select ‘Wiki’ (classic wiki functionality)
4. Then click save
A pop up will appear on the top right of your screen

5. Close it and click on ‘Wiki Home’

It will take you to the home page of your wiki
6. Edit the content on your wiki by clicking on the ‘Edit’ button.

Page 9
2. Edit the welcome message and add your own text, images or widget
3. Add at least two pages to your wiki
4. Upload a powerpoint file to your wiki
Page 10
Page 11

2. Rename a wiki page.
3. Lock a wiki page.
4. Add a notification so that you can receive emails when a member edits your wiki page.
Page 12
1. Click on the 'Members' tab.

3. You can add members to your wiki by clicking on ‘Invite People’.

5. Add email addresses of people you want to invite separated by a comma.
6. You may write your own custom message in the box provided.
7. Then click ‘Send’.

9. They will have to click the link provided in the email sent to them to join your wiki.
10. Once they join your wiki you can see them as ‘Members’.

12. You can also promote any member to have organiser rights.
13. To do this click on the checkbox before the name of the member and select the action you would like to take.

Page 13
1. To set permissions go to ‘Settings’
2. Click on ‘Permissions’ option under settings on the left hand side.
You can also try various settings on your wiki by exploring the options under the four headings
1. Info
2. Settings
3. Look & Feel
4. Statistics
Page 14
Members who have joined your wiki may make changes to your content (as per the permissions set by you).
1. To view the revisions to any of your wiki pages go to the revisions tab on your wiki page.

Under the revisions tab you will be able to see all the revisions that have been made to a particular wiki page
You have an option of comparing two or more versions of a particular page.

To view the changes made to a particular version of the page, click on the revision tab and view the changes made.

When you click on revision you can
1. View inserted, deleted changes
2. Review the changes
3. Revert to the version
4. View an older or newer version

Page 15
Page 16
Page 17

A pop up will open asking you to choose ‘Your Industry’.
3. Click on the drop down arrow.
4. Then select a type of industry.
5. Then click ‘Continue’.
6. Choose a name for your new wiki.
7. Select the wiki type.
8. Then click ‘Create’.
A new wiki will be created.
You can view and select any of your wikis by clicking on the 'My Wiki' link on the top right hand side of your screen.

You can also send a message (mail) to the members of your wiki by clicking on the ‘Message’ icon on your dashboard.

Page 18
1. Go to the settings tab on your home page.
3. Under Application type select ‘Basic Website’.
4. Then click save.
A pop up will appear on the top right of your screen.
5. Close the pop up and click on the ‘Show wiki controls’ icon on the top right of your screen.

6. You can then go to wiki home and start editing your wiki.
Page 19
2. Name the wiki ‘ICTskills-yourname’.
3. Add at least three pages to your wiki.
4. On the first page write a welcome message for your audience.
5. On the second page describe your experience of creating a wiki.
6. On the third page write in brief how ICT skills are important in education.
7. Turn on the notification.
8. Lock the second page of your wiki.
9. Upload a video file to your wiki.
10. Start a discussion for the third page of your wiki.
Page 20
Classroom wiki differs from the classic wiki with respect to these features.
1. Projects
2. Events
3. Assessment
The home page of your Classroom wiki will look like this.

If you see any other view than the one given above then
1. Go to ‘Settings’
2. Click on ‘General’ under the settings tab
3. Under Application Type, select ‘Classroom’.

Page 21
The things you can do with your classroom wiki are listed in the welcome message on your home page.

To begin working on your wiki, first add a welcome message for viewers and information about your class.
1. To do this, click on the drop down arrow in the welcome box.
2. In the drop down menu that appears, click Edit.

3. When you click ‘Edit’ a pop up will open.
4. Type your welcome message there and click ‘Save’.
5. When you click ‘Save’, your welcome message will appear on your ‘Home page’.

2. Add an image to your welcome page.
3. Click 'Save'.
Page 22
On your home page you can click on the icons provided to do the following

1. Add a page to your wiki
2. Upload a file (you may upload as many as you like. Each file must be smaller than 20 MB.)
3. Start a discussion on something that you have posted
(Adding pages, uploading files and starting discussion is similar as shown in the classic wiki module)
4. Add a project to your wiki
5. Add an event to your wiki
When you add a discussion, project or event you are given three additional options.

1. Monitor the replies to your post
2. Allow or deny commenting on your post
3. Notify recipients by email
Page 23
1. Click on the ‘Project’ icon
2. Type a name and description for your project
3. Add date and time to your project (you cannot add time unless you set date first)
If you do not wish to add any dates to your project you may skip step 3.

4. Select if you would like to
a. Monitor the replies to your post
b. Allow or deny commenting on your post
c. Notify recipients by email
5. Then click ‘Create’
Your project will be created.

Adding teams to a project and assigning members to a team is similar to a project in a classic wiki.
You can view and edit all you projects by clicking on the projects tab on the orange bar.

Page 24
1. Click on the ‘Event’ icon.

2. Add a title to your event
3. Add details of the event if any
4. Set a start and end date for your event
5. By default your event is created for the entire day. If you would like to set a specific start or end time click on the ‘All Day’ button.

6. Then add a start and end time for your event
7. Then click ‘Create’.
You can see your event posted on the home page below the welcome message.

8. Click on the drop down menu if you want to:
a. Stop monitoring replies to your post
b. Lock replies (no one will be able to write in the comments section)
To view all the events that you have created for your wiki, click on the ‘Events’ icon on the orange bar.

You can see a calendar view of all your events.
i. Project wise
ii. Month wise
iii. Week wise
iv. Day wise

You can also view, edit or delete all your events by clicking on the list tab on the top right corner of your event page.
You can add new events to your calendar by:
a. Click on ‘New Event’ or
b. Clicking on a particular date in the calendar
Page 25
Create three events for the next week in the weekly view
1. Event 1 on the home page
- Starting on Monday at 11.00 am and ending at 1.30 pm
2. Event 2 for Project 1
- All day long event starting on Wednesday
3. Event 3 for project 1
- Starting on Thursday at 9.00 am and ending at 3.30 pm on Friday
Page 26
You can check the level of engagement of your students with the wiki or project that you have created.
Go to ‘Assessment’ on the orange bar.

Under the assessment tab you get an accurate and real-time reading of their activity on the wiki.
You’ll be able to monitor your students’ level of contribution, see whether they are reading or writing, and give them support when and where it’s needed.

Page 27
1. Create a new classroom wiki in your wikispaces account.
2. Create a three day project ‘ICT tools’ that starts at 8.00 am on the first day and ends at 5.30 on the third day
3. Add events to your calendar for each of the three days of your project ‘ICT tools’
4. Send a message (mail) to your wiki members announcing the commencement of your three day project.
Page 28
10 Best Practices for using wikis in education. (2008, May 21). Retrieved from
https://edtechtoday.wordpress.com/2008/05/21/10-best-practices-for-using-wikis-in-education/
10 Free Wiki Software Platforms – Choose the Best One To Build You Wiki. (2010, May 21). Retrieved from http://www.clickonf5.org/7599/10-free-opensource-wiki-software-engine/
Wikis Explained by Common Craft (VIDEO). (2011, July 11). Retrieved from https://www.commoncraft.com/video/wikis
Wikispaces. (n.d.). Retrieved from http://www.wikispaces.com/
Wikispaces Basics (2013). (n.d.). Retrieved from https://www.youtube.com/watch?v=b_kHULSshBc
Wikispaces Classroom - Events, Projects and Discussions. (n.d.). Retrieved from https://www.youtube.com/watch?v=0leBohyzatM
Wikispaces Classroom - Tutorial 2. (n.d.). Retrieved from https://www.youtube.com/watch?v=BV5sV_02P60